Do u want to create a secured network with BDCOM EPON OLT for your ISP or Local Network? Struggling how to create a secured network with VLAN using BDCOM EPON OLT. BDCOM is one of the biggest networking product manufacturers in china. In this article you will know about BDCOM EPON OLT Configuration commands in detail.
First, we have to log in to olt for configuration.
So Let’s begin
Step 1 : BDCOM OLT login
Configuring any network device first you have to log in to the device. Here BDCOM Epon OLT you can log in using the GE port also using the console port.
Access using Gigabit Ethernet Port
If you want to access your olt using a GE port, you need to connect an Ethernet cable to your PC to OLT any Gigabit Ethernet port.
BDCOM EPON olt have a fixed static IP address at default VLAN. You can reach the IP address using any gigabit port. By default BDCOM EPON OLT IP address is 172.16.0.1. For accessing this IP you need to change your pc LAN IP using the same subnet. We change our pc IP to 172.16.0.2 and subnet mask 255.255.255.0.
Now we can access olt via Telnet (172.16.0.1) or web management http//172.16.0.1
Console Access
Connect your PC to OLT Console port using Console cable. Console cable available at your OLT Packet. You need to USB TO Serial converter to connect.
To get the CLI interface of OLT needs to use software like putty. And make sure to select speed 9600
BDCOM olt default IP address
BDCOM OLT Default IP
IP=172.16.0.1
Username – admin
Password- admin
Step 2 : BDCOM Epon OLT Configuration Commands Uplink Side
Assume we have 4 port BDCOM olt and configure different VLAN to each pon port, 4 pon port with 4 different VLAN
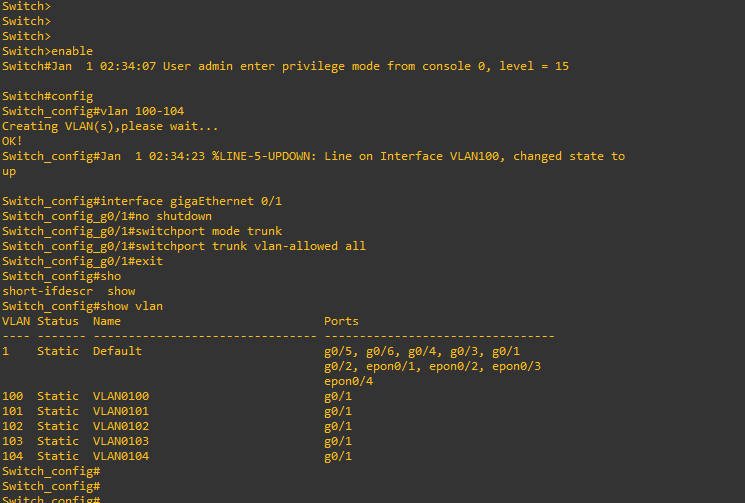
Let’s create VLAN 100 – 104 and configure uplink port GE1 as a Trunk port

Username-admin
Password-admin
Switch>ena
Switch#config
Switch_config#vlan 100-104
Switch_config#show vlan
Successfully created VLAN 100-104 and we use VLAN 100 for olt remote management and VLAN 101 to 104 for PON Port.
Now let’s configure VLAN to GE1 port
Switch_config#interface gigaEthernet 0/1
Switch_config_g0/1#no shutdown
Switch_config_g0/1#switchport mode trunk
Switch_config_g0/1#switchport trunk vlan-allowed all
Switch_config_g0/1#exit
VLAN configured successfully with GE1 Port we can check mac address using below command
Switch_config#show mac address-table
Assign IP address
We can access OLT from our local network using a local subnet IP address also we can access olt any network using public IP address.
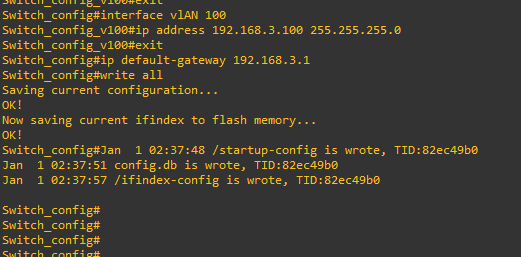
Let’s assign the IP address to VLAN 100 for olt remote access using the below command

Assign an IP address to VLAN 100
Switch>ena
Switch#config
Switch_config#interface vlAN 100
Switch_config_v100#ip address 192.168.3.100 255.255.255.0
Switch_config#ip default-gateway 192.168.3.1
Switch_config#ip route 0.0.0.0 0.0.0.0 192.168.3.1 (this command for 8 and 16 port olt)
Here our router ip address is 192.168.3.1 and OLT IP address is 192.168.1.200. It’s a private IP address so that we can easily access olt using this IP address from our local network.
That’s all we already configured our olt uplink configurations. Let’s configure PON (Passive Optical Network)
Step 3: BDCOM Epon OLT Configuration Commands PON
In this step, we will configure PON (Passive Optical Network) Port with VLAN. Each pon port will work as a private VLAN. Lets stats

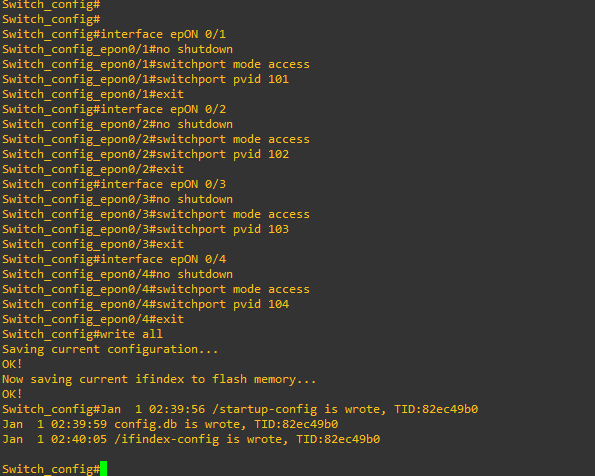
Now we will configure PON Port 1. For this, we have to first access to pon interface then make pon port active using no shutdown command then declare PON PORT 1 as an Access port then assign VLAN 101
1. PON PORT 1
Switch_config#interface epON 0/1
Switch_config_epon0/1#no shutdown
Switch_config_epon0/1#switchport mode access
Switch_config_epon0/1#switchport pvid 101
Switch_config_epon0/1#exit
Successfully added VLAN 101 to PON Port 1 . Let’s start PON Port 2
2. PON PORT 2
Now we will configure PON Port 2. For this, we have to first access to pon interface then make pon port active using no shutdown command then declare PON PORT 2 as an Access port then assign VLAN 102
Switch_config#interface epON 0/2
Switch_config_epon0/2#no shutdown
Switch_config_epon0/2#switchport mode access
Switch_config_epon0/2#switchport pvid 102
Switch_config_epon0/2#exit
3. PON PORT 3
Now we will configure PON Port 3. For this, we have to first access to pon interface then make pon port active using no shutdown command then declare PON PORT 3 as an Access port then assign VLAN 103
Switch_config#interface epON 0/3
Switch_config_epon0/3#no shutdown
Switch_config_epon0/2#switchport mode access
Switch_config_epon0/2#switchport pvid 103
Switch_config_epon0/2#exit
4. PON PORT 4
Now we will configure PON Port 4. For this, we have to first access to pon interface then make pon port active using no shutdown command then declare PON PORT 4 as an Access port then assign VLAN 104
Switch_config#interface epON 0/4
Switch_config_epon0/4#no shutdown
Switch_config_epon0/4#switchport mode access
Switch_config_epon0/4#switchport pvid 104
Switch_config_epon0/2#exit
Switch_config#write all